Instructable : Temperature Logger
17-February-2019Cloud Based Temperature Logger – Jawed Ahmed
I have been wanting to document this instructable for quite a while. I finished the first prototype around 2 years ago and have made a few more full-fledged loggers since then. They are working properly in real life situations for more than a year now. This gives me the confidence to share the project on web.
What this accomplishes
The IoT device takes temperature data via a sensor and then using Wifi Internet saves it to a google sheet every 5 minutes. At the end of the day, the google sheet reads through the day’s data and then writes to a different sheet, the day’s max, min and average temperature. And during the course of the day, the google sheet keeps checking the real time temperature and if it exceeds the threshold at any given time then it shoots and email.
The total cost for the BoM for this project is around Rs. 800 and requires an assembling time of 2 hours.
We use the IoT service from Pushingbox to insert data from the logger to the google sheet.
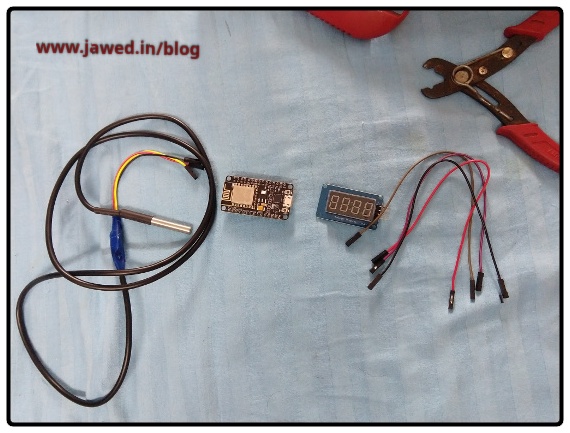
We have used the following components
- NodeMCU
- DS18B20 Temperature Sensor
- TM1637 4-Digit Display
- Connecting Wires
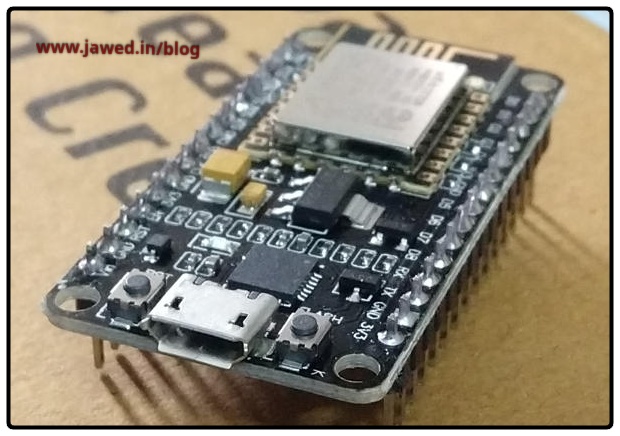
This is the IoT Device. Its called NodeMCU and can be programmed via the Arduino IDE. Its available for around Rs. 350 on Amazon in India.
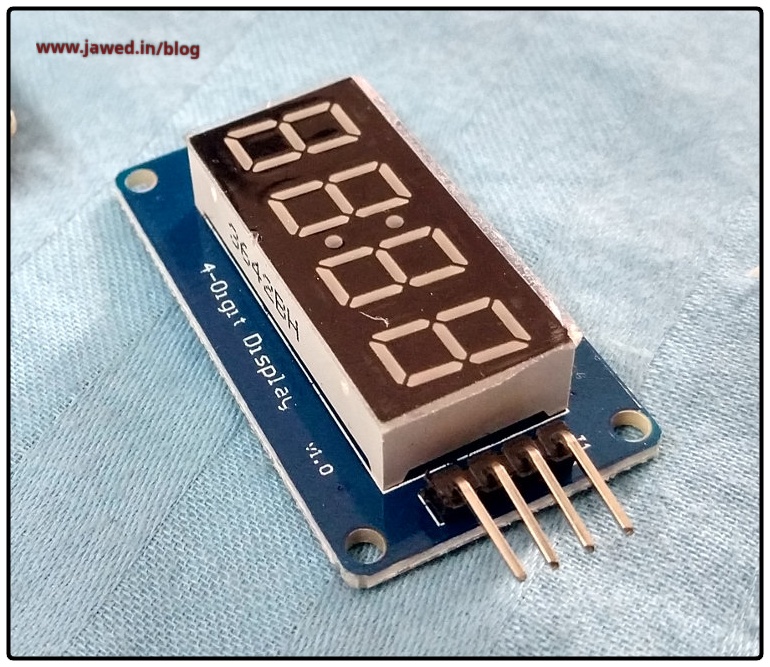
This is the display device. It uses 3.3v supply and is big enough to be seen clearly from around 8-10 feet. It has 4 7-segment digits.
Instruments required
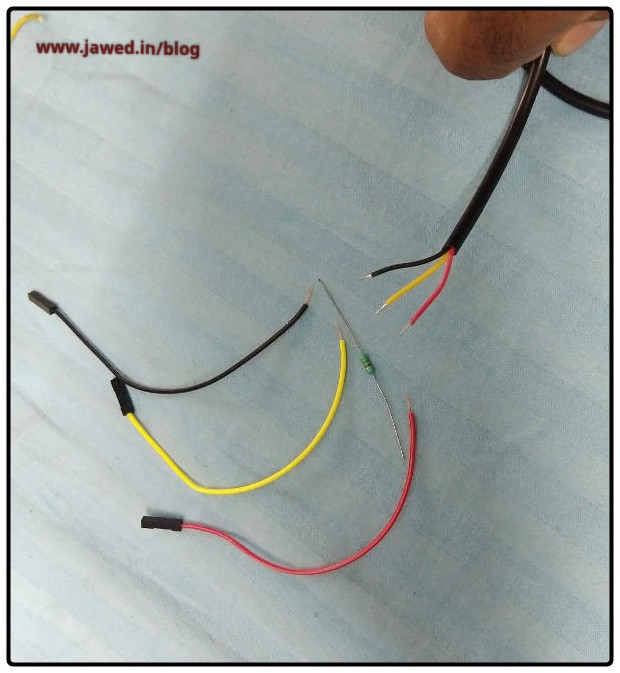
- Soldering Iron ( for the DS18B20 Sensor which needs a pull-up resistor
- Insulating Tape
- Wire Cutter
- Computer with Arduino IDE Setup
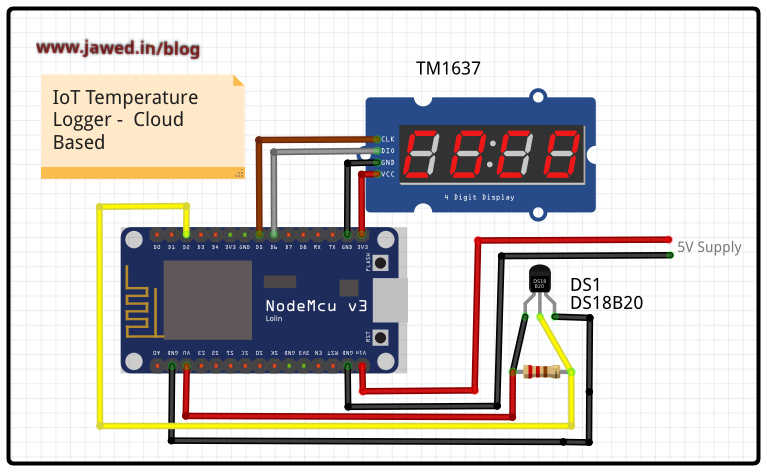
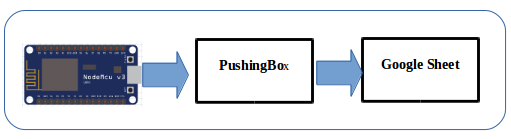
High Level Design
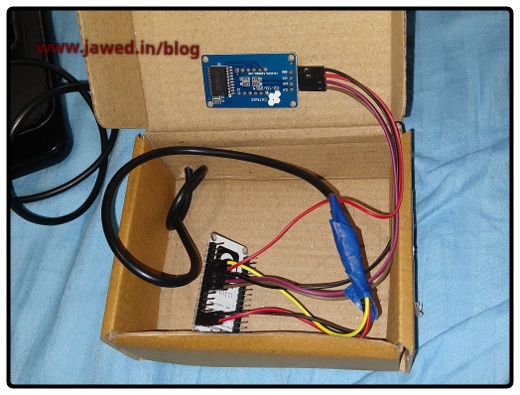
The NodeMCU is a low-cost IoT device that has a lot of digital pins for connecting peripherals, has wifi capabilities and is powered from a easily available phone charger. The DS18B20 Sensor is connected to the devices for generating the temperature values. The TM1637 display is a small 4 digit 7-segment LED display for showing the real-time temperature.
The IoT device sends this data to Pushingbox API. Which in turn writes the data to a pre-configures Google Sheet.
Connection Diagram
Libraries Required
The NodeMCU is programmed using the Arduio IDE and uses the following Libraries
- Wifi Manager https://github.com/tzapu/WiFiManager
- OneWire Library and
- Dallas Temperature Library for the Sensor https://github.com/PaulStoffregen/OneWire
- TM1637 Library https://github.com/bremme/arduino-tm1637
All of these libraries have to be imported into the Arduino IDE before you start compiling the code, otherwise the system will throw a lot of errors.
Software
You need to transfer the arduino code given here to your device. The code is self-explanatory. If you use the same pin numbers which are shown in the connection diagram then you only need to change the Device ID ( you will get this from the PushingBox website)
Cloud
You will use two cloud services, namely Google Sheets and Pushingbox API.
We have to use PushingBox as a intermediary between the IoT device and the Google sheet as, Google requires a https (secure) connection and currently there is no reliable way to make a https connection from the NodeMCU. So the IoT device connects to the PushingBox API service and this service in turn connects to the Google Sheets and inserts the data.
Steps(Hardware Preparation)
- Prepare the Temperature sensor by connecting the 4.7k resistor between the positive wire and the data wire
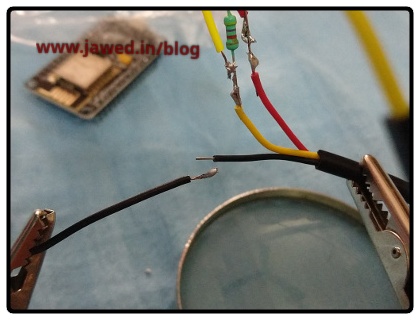
- Solder the open ends of the connecting wires to the sensor.
- Connect the other three ends of the connecting wire to the NodeMCU
- Connect the TM1637 display to the NodeMCU using 4 wires.
Steps on the Cloud
- Create a new Google Account and then login.
- Open the Google Sheets and create the sheet as shown
- Using the same credentials as Google, login to Pushingbox and create a scenario to get your Device ID
Steps to be followed on Arduino
Replace the Device ID mentioned in the Arduino code with the new Device which you got from Pushingbox.Transfer the code to NodeMCU
On first boot, it will create a local Access Point to which you can connect from your phone and then enter the WiFi credentials. When it boots the next time, you will notice that the access point does not start and it automatically connects to Internet using the username/password which you entered earlier.
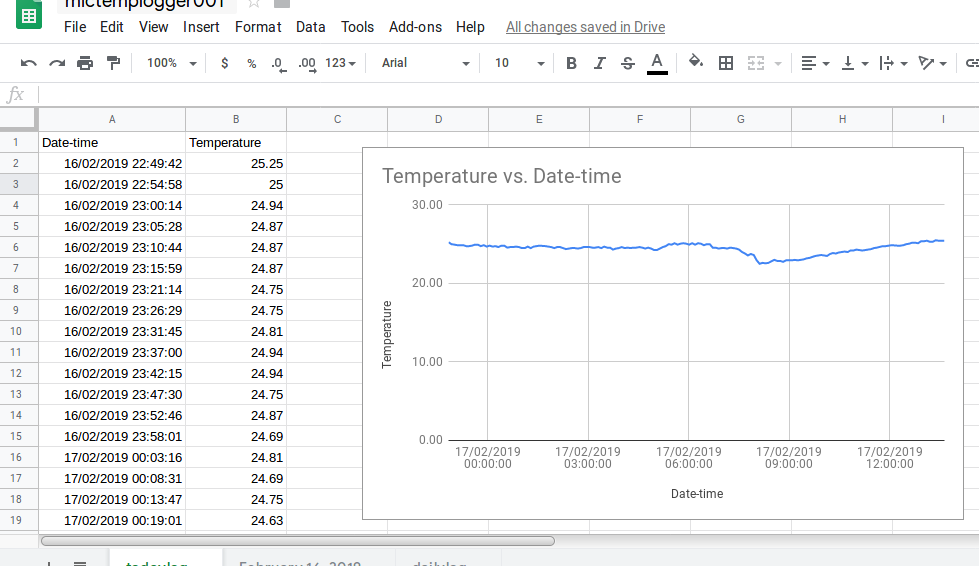
Now you can login to the Google Sheets and see that the data is being inserted every 5- 6 minutes like shown below.
That is all.
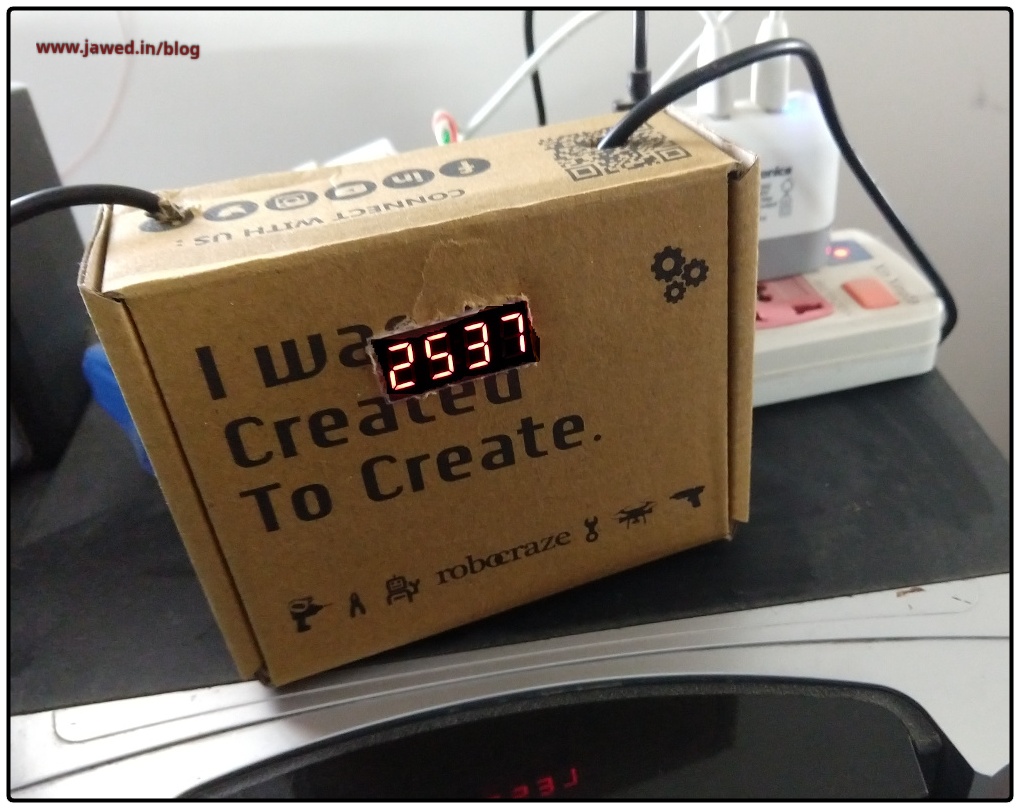
This is the image of the finished Temperature Logger
Please download the source code from these links.
IoT Code
#include <ESP8266WiFi.h>
#include <TM1637Display.h>
#include <ESP8266WebServer.h>
#include <WiFiManager.h>         //https://github.com/tzapu/WiFiManager
#include <OneWire.h>
#include <DallasTemperature.h>


//const int CLK = D6; //Set the CLK pin connection to the display
//const int DIO = D5; //Set the DIO pin connection to the display
const char WEBSITE[] = "api.pushingbox.com"; //pushingbox API server
const String devid = "DEVICEID FROM PUSHINGBOX"; //device ID from Pushingbox
unsigned int loopcount = 0;

#define ONE_WIRE_BUS 2  //this is the pin to which the data wire of DS18B20 is connected (IMP:2 corresponds to physical pin D4!!!)
Google Script Code
function doGet(e) {
  Logger.log( JSON.stringify(e) );  // view parameters

  var result = 'Ok'; // assume success

  if (e.parameter == undefined) {
    result = 'No Parameters';
  }
  else {
    var id = 'GOOGLE SHEET ID';//docs.google.com/spreadsheetURL/d
    var sheet = SpreadsheetApp.openById(id).getActiveSheet();
    var newRow = sheet.getLastRow() + 1;
    var rowData = [];
    //var waktu = new Date();
    rowData[0] = new Date(); // Timestamp in column A